Table of Contents Since the dawn of industrial development, the emission of various toxic gases and solid waste has continuously
Weighing rain gauge
The Renke weighing rain gauge is a low power consumption, easy maintenance, and simple calibration outdoor meteorological instrument. Its data collection system can be optionally equipped with solar power supply, solving the power supply issues in remote areas. Our weighing rain gauge supports RS485 or pulse output, making it compatible with various data collection devices. Our products are strictly manufactured, assembled, and calibrated in accordance with the functional and specification requirements of weighing precipitation sensors.
- Model: RS-CYL-*-1-*-EX
- MOQ: 1 PCS
- Delivery date: within 24 hours
- Price: $1677-1887
Renke Weighing Rain Gauge
The weighing rain gauge is a meteorological instrument that automatically measures precipitation based on the principle of weighing. It uses high-precision load sensors to measure solid, liquid, or mixed-phase precipitation. Our weighing rain gauge can output data such as precipitation intensity and cumulative precipitation. Its real-time precipitation monitoring range is from 6 to 1800 mm/h, making it suitable for various weather conditions such as light rain, heavy rain, or heavy snow. For cold regions, an optional automatic heating function is available to prevent the water inlet from freezing or becoming blocked by snow due to low temperatures. It can be widely used in meteorology, agriculture, water conservancy, and other fields.
Weighing rain gauge features
1. Optional heating function for measuring snowfall and avoiding freezing problems in winter.
2. With automatic drainage function, when the water volume reaches 80% of the total range, the weighing rain gauge starts to drain automatically.
3. High measurement accuracy, compared with traditional tipping bucket rain gauges, it can measure light rain, heavy rain, rainstorms and other rainfall conditions.
4. The shell is specially designed to be windproof, reduce evaporation and increase precipitation capture.
5. Heating is automatically controlled. When the temperature is below 1℃, the device starts heating and stops heating when it is above 9℃.
Weighing rain gauge datasheets
Power supply | 12V DC |
---|---|
Power consumption | 0.15W (DC12V), heating power 30W (optional, power supply DC12V) |
Measure range | 0~1000mm |
Resolution | 0.1mm |
Accuracy | ±0.2mm, ≤10mm; ±2%, >10mm |
Working environment | -35℃~+65℃, 0%RH~95%RH non-condensing |
Output signal | RS485/pulse |
Weighing Rain Gauge FAQs
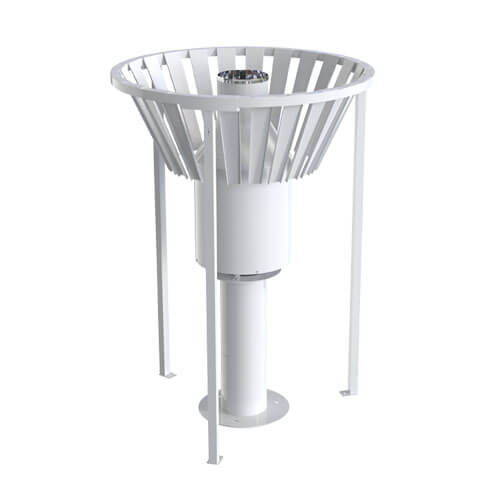
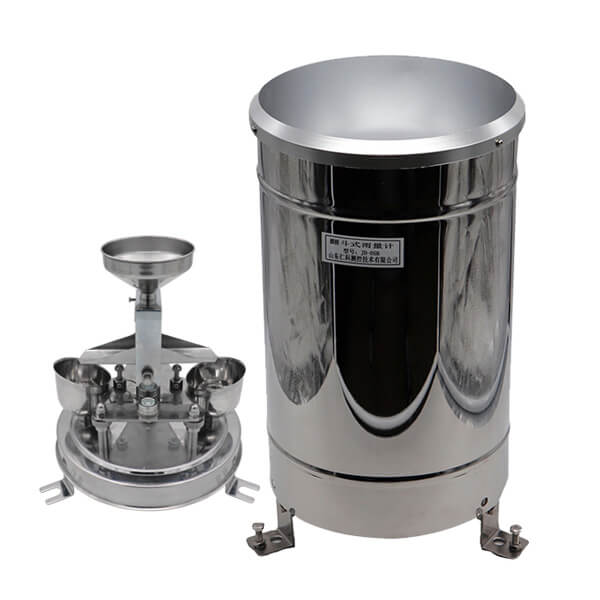
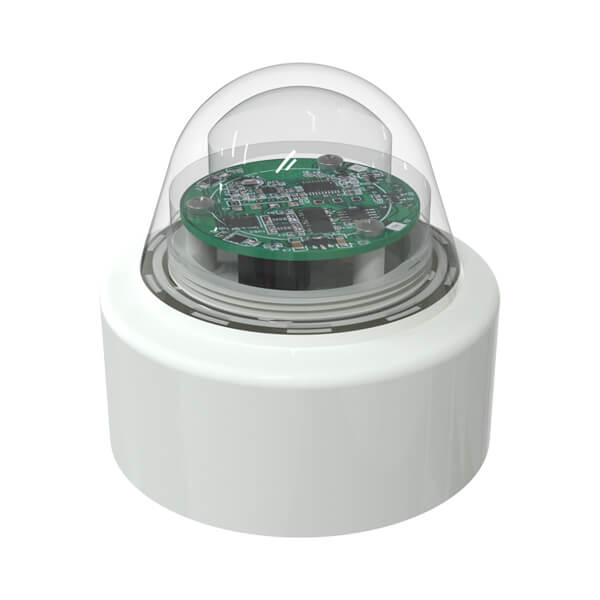
1. How does a weighing rain gauge work?
The weighing rain gauge collects precipitation through a funnel. Once the rainwater enters the collection basin, a weighing device continuously monitors the change in water volume within the basin. As the water volume increases, the weight of the collection basin also increases. The load sensor converts the weight signal into an electrical signal, which is then processed by the data acquisition system to calculate and output the precipitation data.
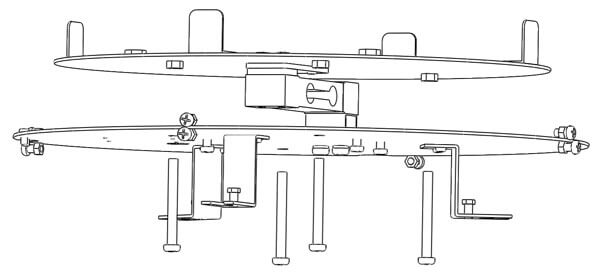
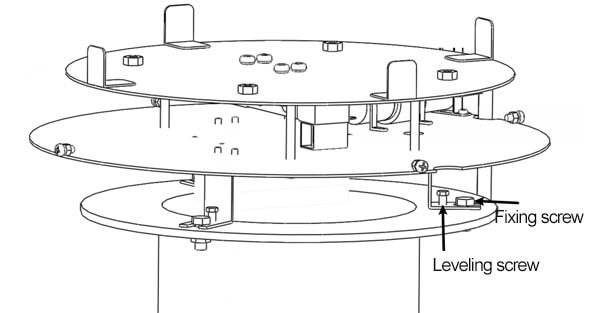
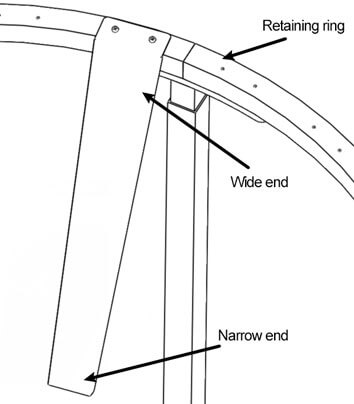
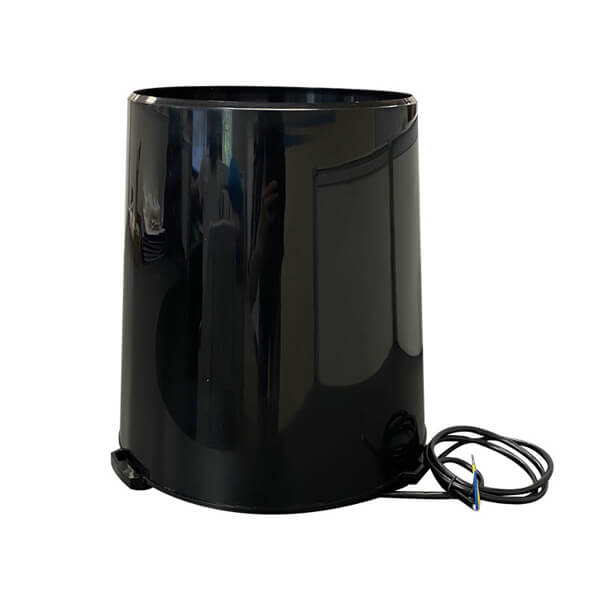
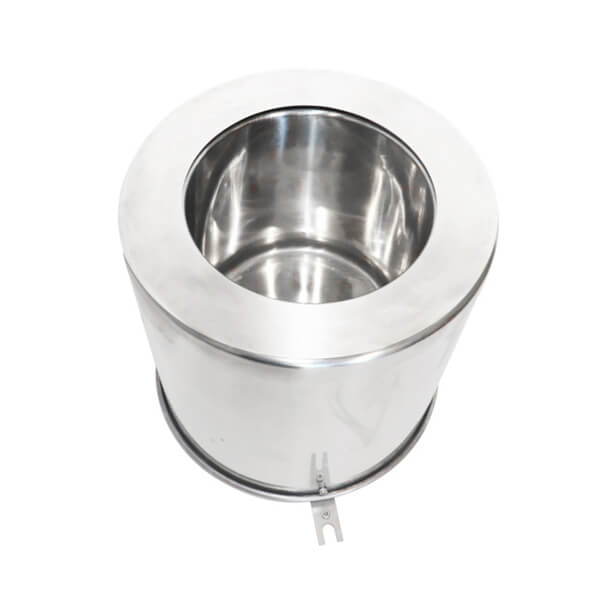
2. How to install a weighing rain gauge?
Foundation construction
The size of the concrete foundation is 150cm (length) × 150cm (width) × 50cm (depth), and the height is flush with the ground. According to the dimensions in the figure below, drill 6 φ18 installation holes with a depth of 12~15cm (two circles are concentric) on the cement foundation, and place the expansion bolts in the installation holes.
Base installation
Put the DC power supply (provided by the user) line and the output signal line from the distribution box through the concrete foundation threading tube. Fix the base to the concrete foundation with bolts and nuts. To facilitate the horizontal adjustment of the base later and ensure the overall installation quality of the sensor, please keep the base as horizontal as possible during installation.
Rain gauge installation
Remove the three screws from the weighing rain gauge housing, remove the housing and place it in a transport box for safekeeping. The device has a transport lock consisting of four hexagonal countersunk screws (M6*60). This reduces the risk of damage to the electronic balancing system during transportation. The transport lock should be removed before installation.
Fix the three leveling bolts (M5*10) on the base, place the entire base on the base, and fix the base on the base with three sets of fixing bolts (M8*20) and nuts (M8) (the bolts are not tightened). After adjusting the three leveling bolts to the level of the base plate, tighten the three sets of fixing bolts with a wrench. Connect the heating device to the main control unit.
Pre-adding liquid
To improve the measurement accuracy, add about 1L of water to the sampling barrel before use, and then place the sampling barrel firmly on the tray.
1. If evaporation is severe, environmentally friendly evaporation suppression oil can be used. The amount added should be based on the complete coverage of the liquid surface in the collection container. Do not add too much.
2. When the temperature is below 0℃, antifreeze should be used. Antifreeze should be mixed with environmentally friendly solutions to ensure that the liquid in the collection container does not freeze in a low temperature environment below -35℃. Antifreeze should be added before winter. No water is required after adding antifreeze.
3. When used below 0℃, if antifreeze is not used, the precipitation should not exceed 80% of the barrel volume. Otherwise, it will cause irreversible damage to the measurement system.
After installation, reinstall the outer shell of the outer cylinder to the base.
Install the windshield ring
Note that the precipitation sensor is in the center of the windshield ring, and the height of the windshield ring should be slightly higher than the upper edge of the sensor water receiving port. The installation of the windshield ring is an independent process compared to the installation of the sensor. The windshield ring can be assembled in an open space first, and then moved to the foundation for fixing; it can also be assembled directly on the foundation.
Install the windshield fixing ring
Fix the three “T”-shaped support brackets to the upper part of the three vertical rods with spring washer screws (M5*10), and the inner arc of the T-shaped bracket should be in the same direction as the groove of the support plate.
Install the three windshield fixing rings to the three windshield brackets with M5 butterfly screws (M5*16).
Install the windshield blades
Install the windshield blades to the windshield fixing ring with screws (M4*12). When installing, the height and angle of the windshield blades should be fine-tuned appropriately to make it beautiful. Note: Generally, adjust the blade position until the upper edge is flush with the upper edge of the fixing ring.
Complete installation
After all the windshield blades are fixed, the windshield assembly is completed. Finally, install it to the windshield fixing screws pre-installed on the foundation. Adjust the height of the windshield through the waist-shaped holes of the windshield vertical rod so that the upper plane of the windshield fixing ring is 2cm higher than the upper edge of the sensor port.
3. How to connect the weighing rain gauge?
RS485 output
Line color | Illustrate | Line color | Illustrate |
---|---|---|---|
Brown line | Power supply positive | Yellow line | 485A |
Black line | Power supply negative | Blue line | 485B |
Analog output
Line color | Illustrate | Line color | Illustrate |
---|---|---|---|
Brown line | Power supply positive | Yellow line | Pulse output NO terminal |
Black line | Power supply negative | Blue line | Pulse output COM terminal |
4. What is included in the packing list?
Weighing rain gauge*1
Mounting base*1
Windproof ring*1
5. What are the advantages of a weighing rain gauge?
High precision: Since the weight of precipitation is directly measured, the weighing rain gauge has higher precision than other types of rain gauges.
Strong adaptability: It can adapt to precipitation of different intensities, whether it is light rain or heavy rain, it can accurately measure.
High degree of automation: It has strong automatic recording and data output functions, suitable for unattended long-term monitoring.
5. How to debug the weighing rain gauge?
The weighing rain gauge is connected to the sensor power supply on site. To ensure that the sensor is installed and connected correctly, after setting the parameters, the sensor needs to be tested before the formal test. The steps are as follows:
- Connect the communication line of the weighing rain gauge to the laptop
- Run the configuration software on the computer and configure the communication parameters
- After the device is powered on for 5 minutes, add water for testing
- Use a 10mm rain gauge special measuring cup to slowly pour 10mm water into the rain gauge barrel (it takes about 2 minutes)
- Use the configuration software to read the precipitation, the result should be 10mm±0.2mm
6. How to download the manual of the weighing rain gauge?
Please contact us to obtain the manual.
Related Blogs
Table of Contents What is evaporation? Water exists in three states in nature: liquid, gas, and solid. These states can
Table of Contents The Internet of Things (IoT) is one of the hottest technology words in the past few years,
Due to the strong regional and diurnal variation of rainfall, accurate measurement of rainfall has been difficult to achieve in
The weather sensors are the sensing end of the weather station and collect various weather-related data. The weather station can
What is a tipping bucket rain gauge? A tipping bucket rain gauge is one of the most standard sensor used