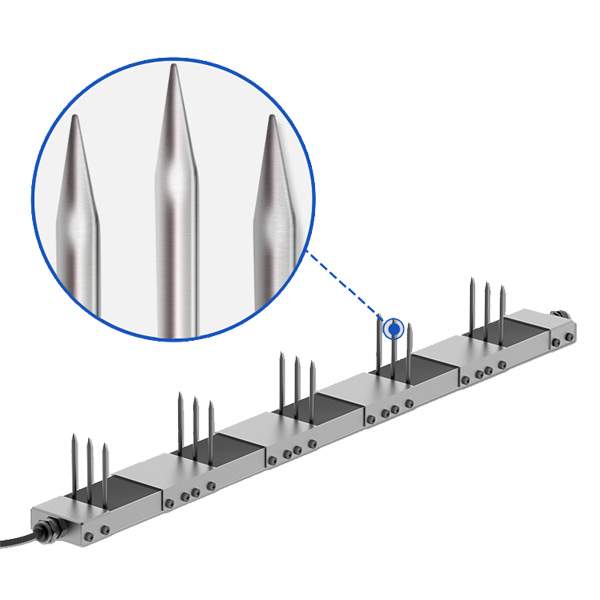
Table of Contents What is soil water? Soil water is a general term for all forms of water in the soil, including water present in
Multi-Depth Soil Sensor
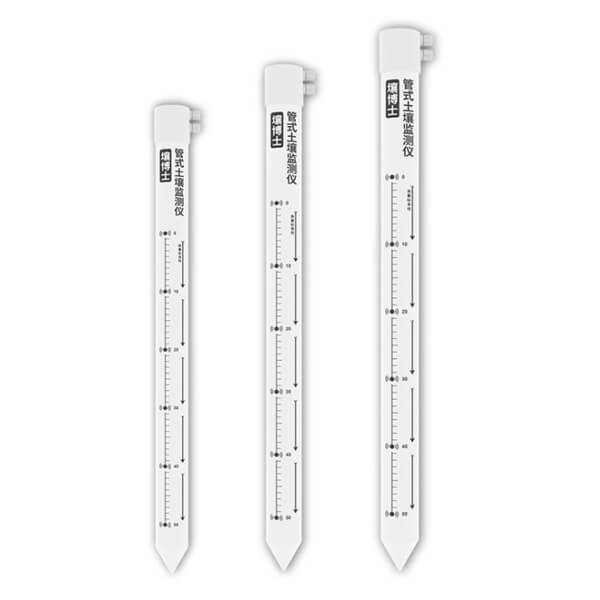
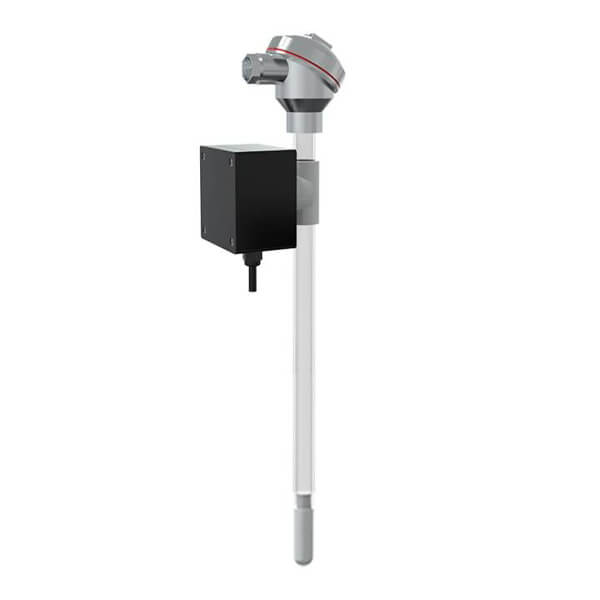
It is a device that can dynamically observe soil moisture and temperature conditions at different depths. This kind of soil sensor has multiple layers to choose from, and the number of other layers can be customized. This multi-depth soil moisture sensor has a variety of probe lengths and can be used to measure depths from 30 cm (11 in) to 100 cm (40 in). It can quickly and comprehensively understand and collect soil moisture information, scientifically formulate drought-resistance scheduling plans.
- Model: RS-*W*S-*-TR-6-EX
- MOQ: 1 PCS
- Delivery date: within 24 hours
- Price: $209.7~$377.4
About Multi-Depth Soil Moisture Sensor
Description
The Renke multi-depth soil moisture sensor system is a cost-effective and scalable soil sensor network that can enable monitoring of field conditions through a free cloud platform for crop management. You can reasonably arrange the installation points of soil sensors on your farmland to easily monitor the entire farmland through a system.
Renke is a manufacturer of multi-depth soil sensors, and we support customization.
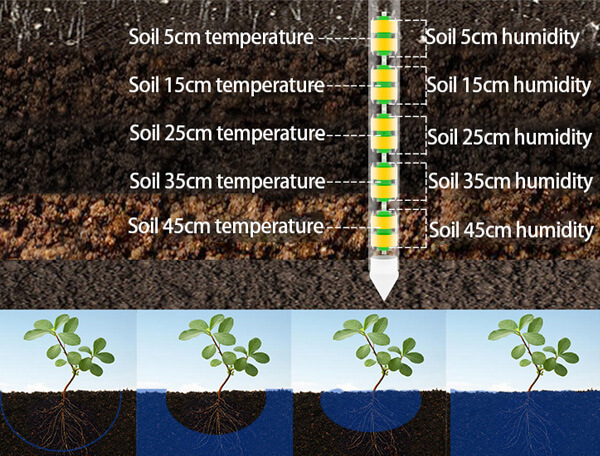
Multi-Depth Soil Sensor Features:
1. The shell of this multi-depth soil sensor is made of PVC plastic pipe, and the high-frequency detection wave of nearly 1G Hz is emitted inside, which can penetrate the plastic pipe and effectively sense the soil environment.
2. The multi layer soil sensor is not affected by salt ions in the soil, and agricultural activities such as fertilizers, pesticides, and irrigation will not affect the measurement results, and the data is accurate.
3. The electrode of the sensor is not in direct contact with the soil to avoid the interference of electricity to the soil and the plants in the soil.
4. The multi-depth soil sensor adopts the standard Modbus-RTU485 communication mode, and the farthest communication is 2000 meters.
5. Support 10-30V wide voltage charging.
Application
The multi-depth soil moisture sensor shell is made of PVC plastic pipe, which will not be affected by salt ions in the soil. Agricultural activities such as fertilizers, pesticides, and irrigation will not affect the measurement results, and play a good role in protecting the circuit.
The multi-depth soil moisture sensor is suitable for the detection of soil moisture and drought information, or real-time detection of weather, water and rain, moisture, agricultural conditions, water conservancy projects, and other places.
Multi-depth soil moisture sensor parameters
Power supply: 10-30VDC
Operating temperature: -40℃-80℃
Measuring range:
Soil moisture: 0~100%
Soil temperature: -15℃~35℃
Accuracy:
Soil moisture: ±5%(@50%,25℃)
Soil temperature: ±0.5℃(25℃)
Measuring point spacing: 10cm
Shell material: PVC plastic pipe
Protection level: IP68
Output signal: RS485 (Modbus protocol)
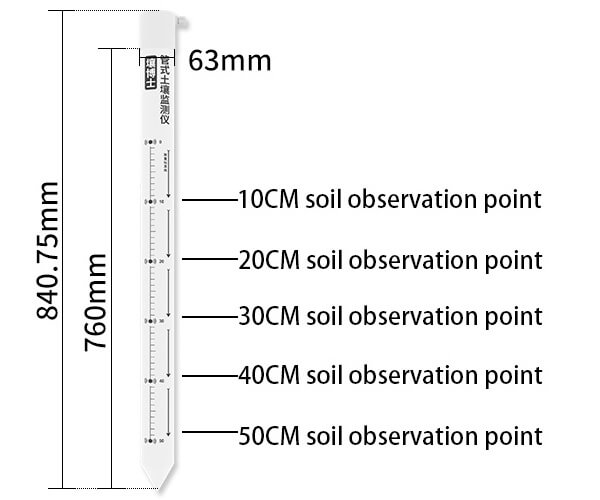
Multi-Depth Soil Sensor Installation
How to choose the installation location?
1. Install the multi-depth soil sensor after the crop is sowed
2. The installation location needs to be flat
3. Under the condition of full irrigation, preferentially select the area with less water as the monitoring location, under the condition of partial irrigation, select the humid area as the monitoring location
4. Select a position where crop growth is balanced and can represent the growth of most crops
5. To understand the root distribution of the monitored crop, generally choose a location closer to the water-absorbing root system of the crop.
Note: The installation site of the equipment should be selected at a relatively high terrain to prevent rainwater from pouring into the equipment and causing short circuits or line failures.
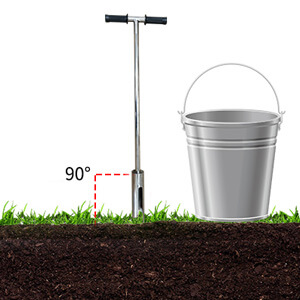
Installation step one
Use a soil drill to drill holes in the right place
1. Put the soil auger upright on the ground, hold the handle tightly with both hands, press it down, and slowly rotate it clockwise. (Note: Don’t use too much force, make sure to rotate a few more times slowly to prevent the drill bit from running off to the hole.)
2. Take the soil drill out of the hole, put it in a bucket, and collect the soil in the soil drill into the bucket for the next step and mud. (Note: because the first drilling soil is not collected due to excessive impurities)
3. Repeat the above-mentioned drilling and soil extraction, and in the process, try to put the sensor into the hole gently (do not force the device to touch the bottom) to test whether the depth of the hole is appropriate; if there is a jam, then Use soil drills to make corrections to ensure that the sensor is put in and taken out smoothly; until the depth of the hole is flush with the installation position marked by the sensor, the drilling is completed.
Installation step two
Making mud
1. Pick out the impurities in the soil taken out by the soil drill, such as stones, grassroots, and clods that are not easy to dissolve. Rub the soil finely to mix with the mud.
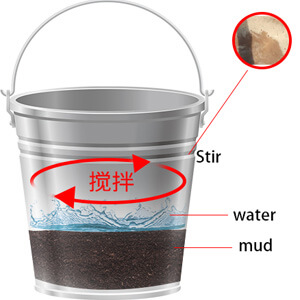
2. Pour in an appropriate amount of water and stir well until it is vicious, the loam mud is generally not thicker than “sesame paste”; and the mud is completed.
Installation step three
Grouting installation
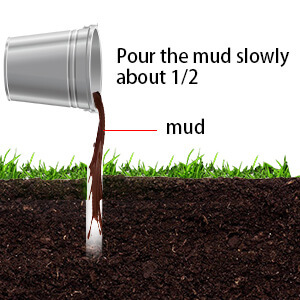
1. Pour the mud slowly into the hole, about 1/2 of the hole. It can be increased or decreased according to the actual situation.
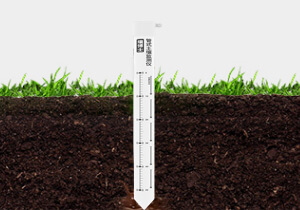
2. Slowly put the sensor into the hole, slowly turn it in one direction and press it down. If the speed is too fast, the bubbles may not be discharged completely. (Note: Do not pull up the sensor during the process of turning and pressing again to prevent the gas from being sucked into the hole again).
3. When the sensor is installed to the correct depth, some mud will overflow around the equipment, and the grouting is completed; at this time, the installation depth of the sensor is flush with the hole. (Note: Remove excess mud beyond 3CM around the sensor to prevent agglomeration from affecting moisture infiltration).
Installation step four
The installation is complete
After the device is connected to the power cord and the 485 communication line, the device will emit a beep, and the device will be turned on and it can work normally. It is recommended to perform normal work after the mud returns to its normal state.
Other considerations
Essentials of sand installation
The sandy soil installation is the same as the loam standard installation procedure. It should be noted that sufficient water must be prepared, not less than 5L. before grouting, pour water into the hole and wet the entire hole wall until there is excess at the bottom of the hole Until the water appears. Then follow the steps to slowly pour the mud into the hole, about half of the hole. The rest of the installation steps can refer to the installation of loam.
Clay installation points
Installation of the clay After drilling the hole to collect the soil, after cleaning up the impurities, soak the clay in water for more than 4 hours to soften the clay and make it easier to live into a more uniform slurry. After the soaking is complete, stir it into a vicious shape, and just grout. The rest of the installation steps can refer to the installation of loam.
Other soil sensors
Related blogs
Soil moisture is the source of the survival of plants. Soil moisture refers to the moisture content of the soil. The moisture content of the
Soil moisture sensors are also known as soil moisture meters. It is mainly used for measuring soil volumetric water content, monitoring soil moisture, agricultural irrigation,
Table of Contents What is IoT? IoT is the “Internet of things“. It is an extended and expanded network based on the Internet. It combines
What is smart farming? Smart farming is the application of Internet of Things technology to traditional agriculture, using sensors and software to control agricultural production
Agricultural irrigation mainly refers to irrigation operations carried out in agricultural farming areas. Agricultural irrigation methods can generally be divided into traditional surface irrigation, ordinary

